Sometimes one photograph isn't enough. With a painting you'd like to show the signature or the underdrawing revealed by an X-ray; with a sculpture, the back that visitors can't walk around in the exhibition; with a historic building, an image from the time when it still stood in its original form. But exhibition space has its limits, and only so much visual material fits into it.
That's why you can upload several images to a single stop. While the audio plays, the images rotate smoothly and accompany the narration. When something catches a visitor's attention, a tap opens the gallery and they can browse all the photographs or illustrations at their own pace, in their original aspect ratio.
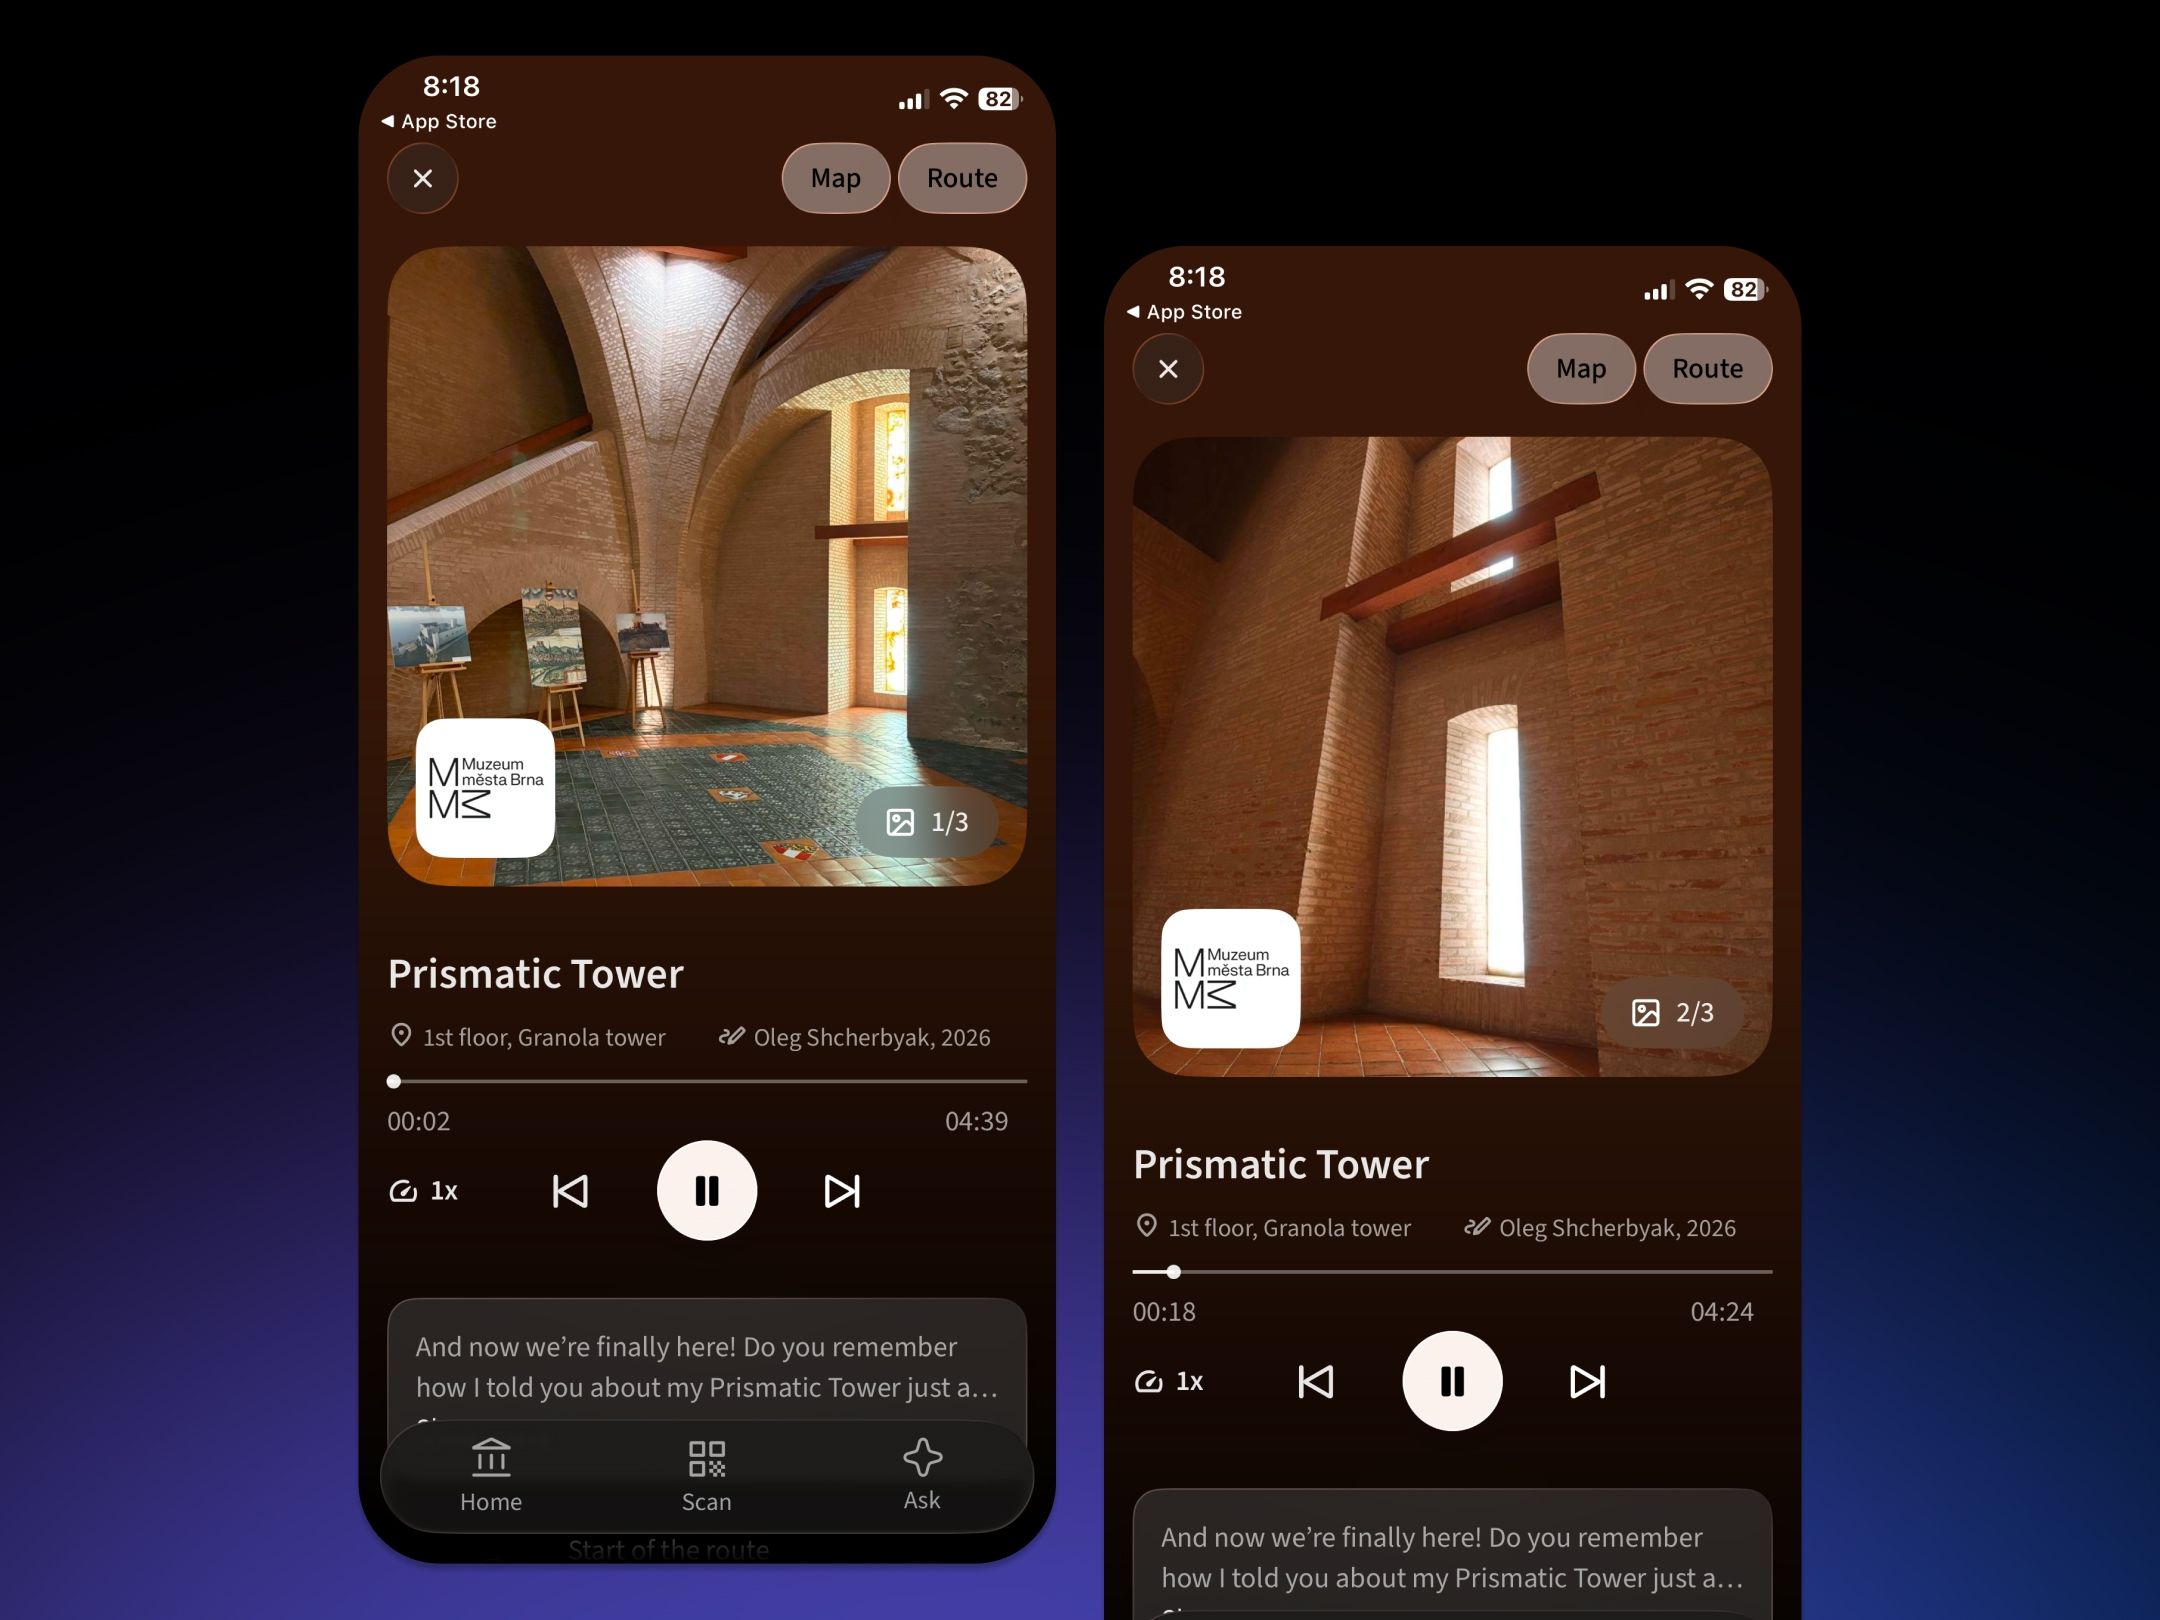
Several images at a single stop. The images switch one after another during playback.
What you can show
You may already have the visual material ready from other occasions: from preparing a catalogue, from a conservation report, from archival research. The image gallery gives you room to present it in context, right next to the object. So what can you show here?
- Details of the object that visitors can't make out from a distance: a signature, a workshop mark, brushwork, the texture of the material
- Hidden sides of an object: the back of a painting, the inside of a vessel, the reverse of a sculpture, the mechanism inside a clock
- Special imaging: X-rays, infrared reflectography or ultraviolet photographs that reveal underdrawing or later interventions
- Preparatory drawings, sketches and studies that preceded the finished work
- Conservation photographs: the condition before treatment, the work in progress and the result- Historical images of a place or building that show how it used to look
- Archival documents: letters, plans, period posters, catalogue cards, photographs of the original installation
- The context of the work: the artist in the studio, the object in its original setting, a period photograph from the site where it was found
- Objects from the collection that didn't fit into the exhibition but relate directly to the topic
- Maps, diagrams, floor plans and sections that help visitors get their bearings in the space or in the structure
- Comparative material: a second version of the work, a variant by another artist, a similar object from another collection
In the course of a single story, visitors see more than the display case alone can offer. And you get more out of material the organisation has already invested time and energy in.
What visitors see
When a visitor plays the audio commentary for a stop, the images rotate on their own above the player. The transition is smooth — a slow cross-fade, not a flicker. The pace follows the length of the audio: the images are spread out so that they accompany the whole story.
An icon in the corner of the image shows the position and the total number of images, for example 2/3. Visitors can see straight away that there is more material at the stop.
Tapping the image opens the stop's gallery. There, all the images sit one below another in their original aspect ratio, portrait as well as landscape, so they can be viewed at leisure and without cropping.
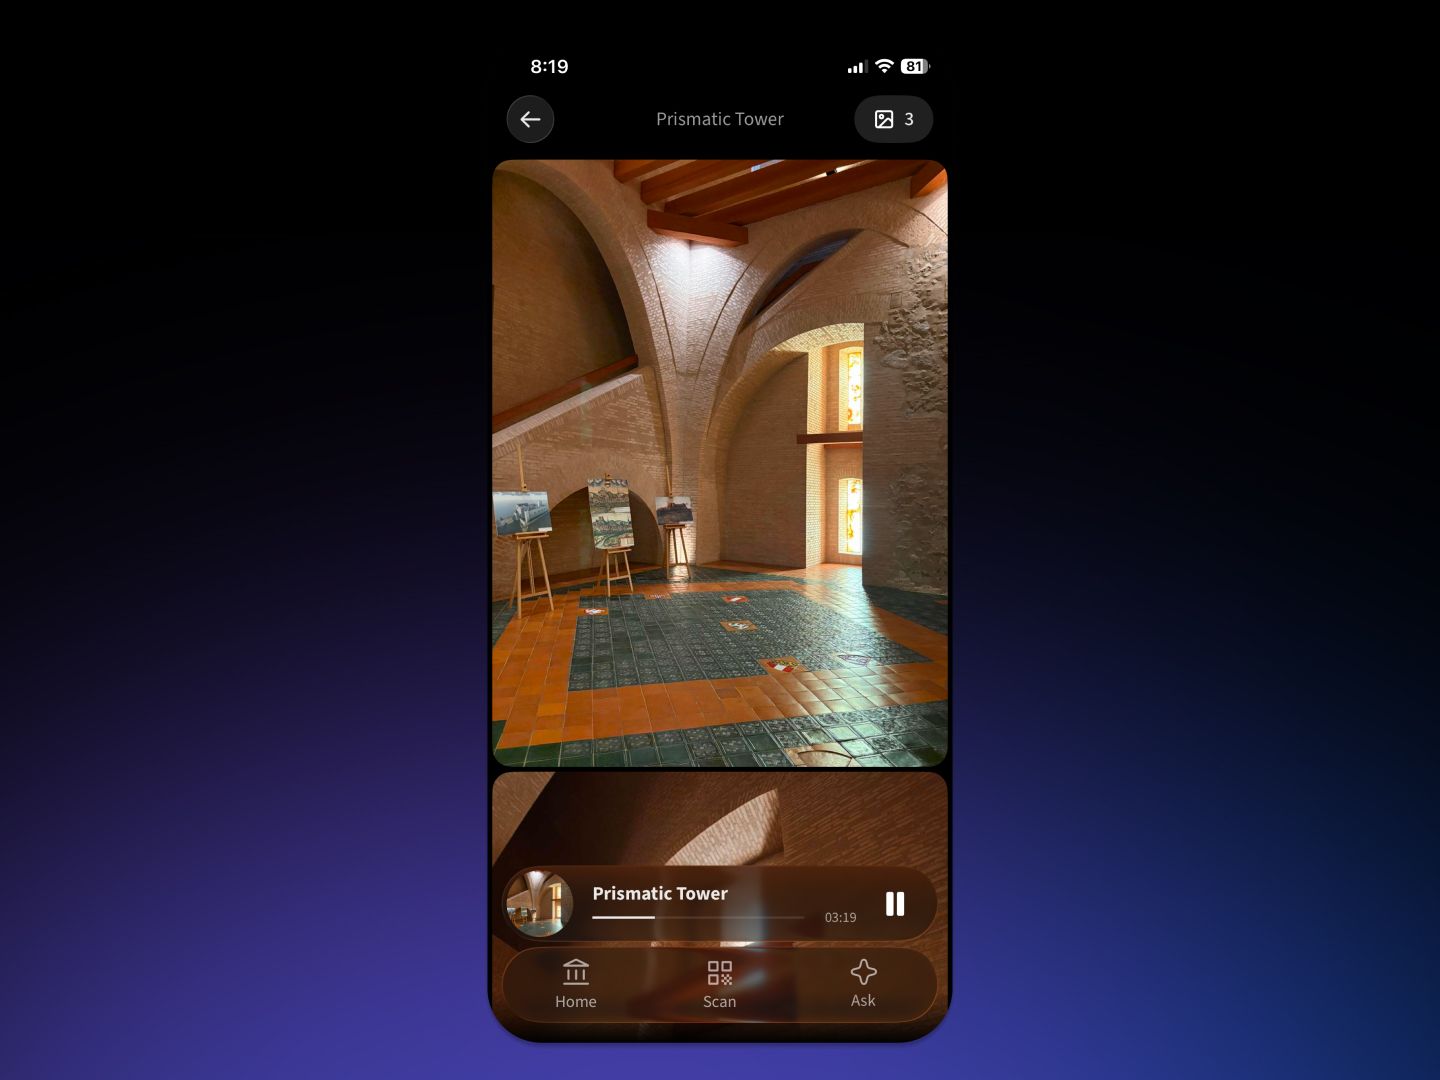
A detail of the image gallery in the mobile app
How to add images
You set the gallery up in Cabinet Studio, right at the individual stop.
- Sign in to Cabinet Studio
- Go to the Stops section and open the stop you want to add to
- Upload further images in the Images section
- Drag them to set the order in which they should appear
- Save your changes
The first image in the order stays the main one. It appears in overviews, in the list of stops and whenever the audio commentary isn't playing. So choose it to represent the stop well.
You add images to a route and to a place's introduction in the same way. The logic is the same everywhere: upload, order, save.
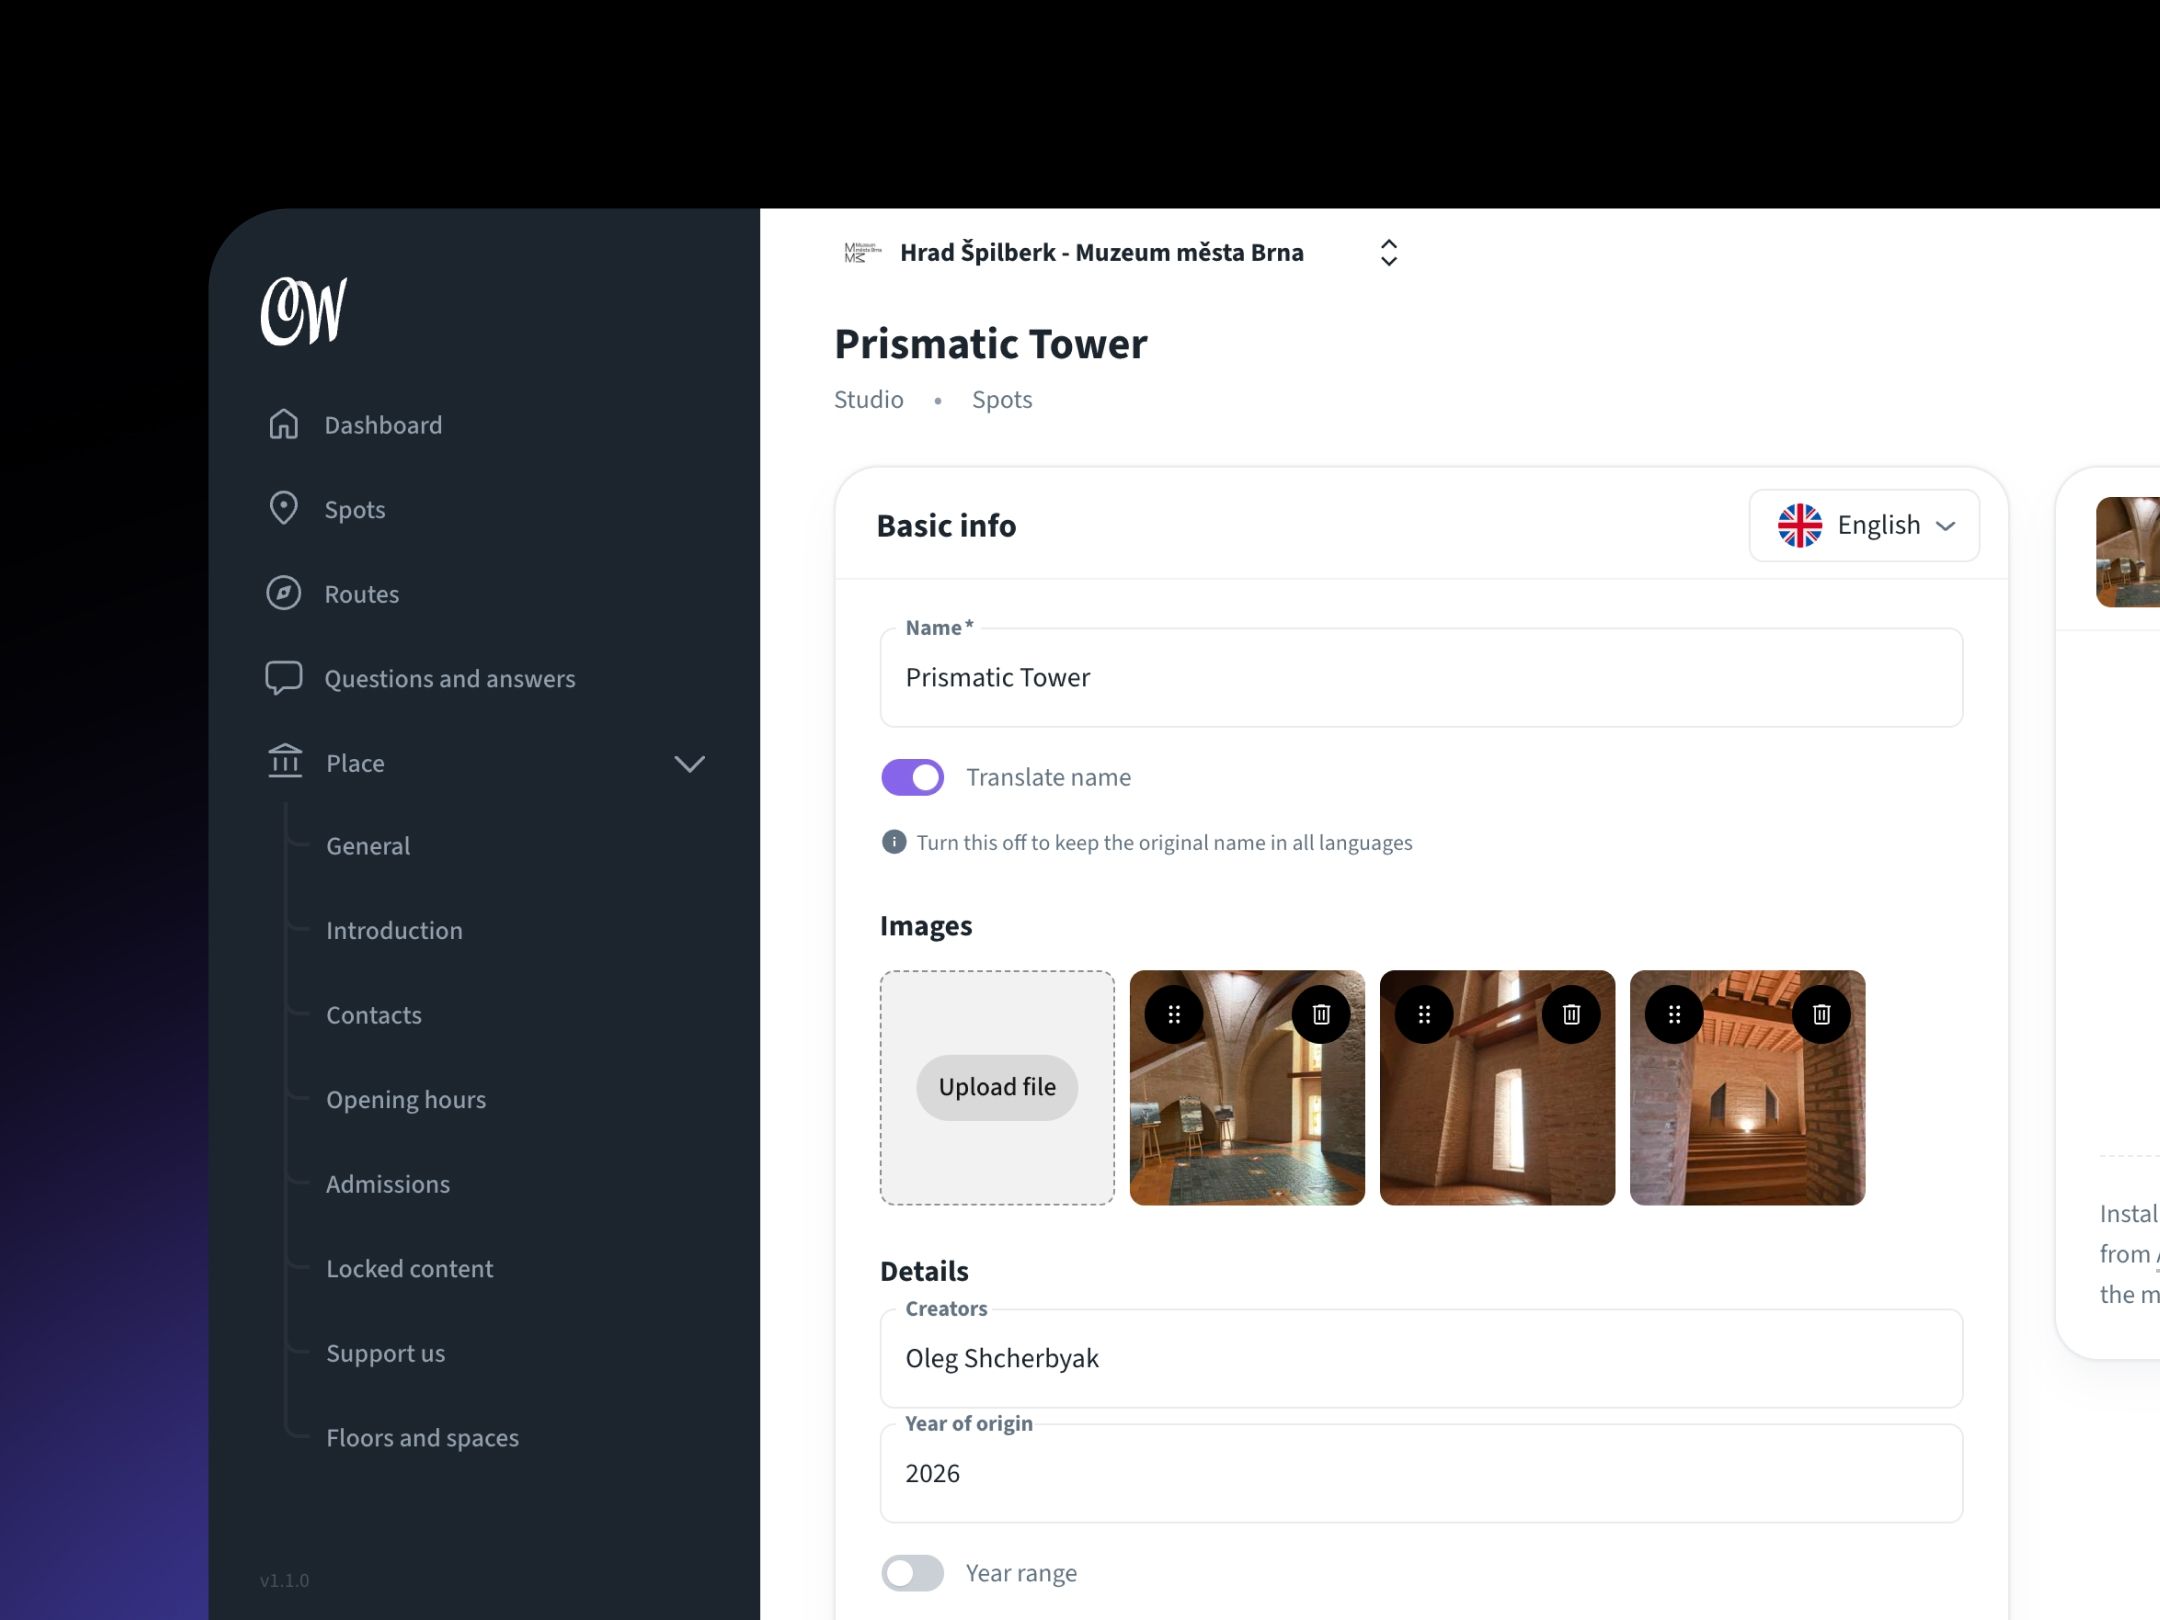
Editing the images for a stop in Cabinet Studio.
The order of the images is part of the script
The images don't rotate at random. They are spread across the whole length of the audio commentary in exactly the order you set in Cabinet Studio. It's worth making use of that and arranging them to follow the flow of the narration.
If the audio opens by introducing the artist, show the signature in the corner of the canvas or a portrait of them. If you get to a conservation finding halfway through, put the X-ray in the middle. Visitors then look at exactly what they are hearing about.
Good to know
You can upload files in JPG and PNG format, up to 5 MB in size.
You don't have to worry about file size beyond that. The system creates smaller variants of every uploaded image on its own, and the app downloads only the one it currently needs. Visitors don't download unnecessary data, even on a slow connection. Images look best when their longer side measures at least 1280 pixels — that's the resolution they are displayed at in the gallery.
Images are shared across all the languages of your guide and are set in the main language. So you don't have to upload them again for each language version.
The image-count icon and the automatic rotation switch on from the second image onwards. A stop with a single image simply shows that one image.
The main image appears above the player in a square crop. With portrait images or very wide panoramas, count on some cropping and place what matters closer to the centre. In the gallery, the image is then shown in full.
When a visitor downloads a place's content for an offline visit, the whole gallery is saved, including every additional image. In buildings with a weak signal it is worth recommending that visitors download the content.